Post by Ange Keating on May 21, 2012 13:54:13 GMT -8
Roleplay Avatars
& How to Upload & Update Them With Photobucket
& How to Upload & Update Them With Photobucket
Your Roleplay Avatar is used during Roleplay to give a reminder to readers just who is being written about and give a visual image of your character to aid in the reading process. At Wander, we require your avatar to be hosted by photobucket. This is for a very specific reason I will detail in a tutorial coming up.[/b]
To Register to Photobucket
After you register, log back in whenever you wish by
When you log in, you will be presented with your main area of uploads. For someone newly registered, nothing is on there because you haven't uploaded anything yet. So let's upload something! Say, your avatar?
Now, before you upload your avatar, make sure it is
Alright, so you've got your avatar saved and it follows the above requirements. Time to upload it to your photobucket!
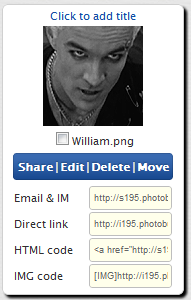
So, my character's name is William. As seen here, I uploaded it to my photobucket. It's a picture of an actor, which is allowed, with the dimensions of 100x100 pixels and saved in .png format. It is also saved as William.png. To prove all this, if I just hover over my uploaded avatar, this shows up with all the information and codes:
The code you'll need to give in the roleplay forms is the Direct link. Copy the code photobucket gives you and paste it where the form tells you to.
Now, say down the road you want to change your character's avatar. This is EXACTLY why Wander requires the use of photobucket. With no help from the staff, you can update the avatar instantly.
Before heading back to photobucket, make sure you save your avatar with the EXACT SAME FILE NAME AND TYPE as the original uploaded and submitted avatar. This means that because I saved my character's original avatar as William.png, the new avatar must also be William.png. It cannot be Willie.png, William.jpg, it MUST BE EXACTLY William.png. Also remember to keep to the same avatar requirements - .png or .jpg, 100x100 pixels, etc. This new avatar does not have to be saved in the same place on your computer as your old avatar, but it must have the same file name and type.
To replace your old avatar with your new one, do the following:
3) VOILA! It is done. You may need to go to the direct link and click refresh on your browser for the change to show up.[/ul]
I show as evidence to you, my replacement avatar:

If you need help, have questions or suggestions, please PM ange.[/blockquote]


